Google Earth
Introduction to Google Earth
Software needed:Google Earth Pro or Google Earth in web browser.
Objectives
- Become familiar with navigating Google Earth Pro or Google Earth in web browser and their toolbars
- Learn how to add placemarks, lines, or polygons
- Create a KMZ/KML file with multiple locations/placemarks
- Become familiar with coordinates
- Use time sliders to understand changes (in Pro Version)
- Use the measuring tool to become aware of spatial relationships(and elevation profiles within Pro to understand landscapes and elevation change)
Google Earth How-To
Download the Google Earth How-To Document.
World Regional Geography KMZ Files
Click to download each KMZ file.
Google Earth Pro

Figure 1. The toolbar in Google Earth Pro.
Before students navigate to places around the world, it’s helpful to learn the tools available by looking at things they’re more familiar with. To do this, we recommend having them navigate around their own neighborhood and/or school to create a small KMZ file and learn to measure distance and find coordinates.
They can add placemarks to their home and figure out what the coordinates are by right clicking and looking at “properties” after they’ve added a placemark. They can use the ruler tool to draw a path and measure the distance from their home to school or other locations they may be interested in mapping. And they can use the “Show Historical Imagery” time sliders to understand how their neighborhoods have changed over the recent decades.
There is also an opportunity to discuss population and demographic changes, economic impacts, flood risk, etc. related to development or decline of different areas around Texas. Once students are comfortable navigating Google Earth and the toolbar, they can be apply these tools to any area around the globe.
Creating a KML or KMZ File in Pro
Below is a basic tutorial on using the tools in Pro first and Earth for web browser after. Please note that KMZ or KML files created will open in either version.
Both files will work in Google Earth Pro or Google Earth in web browser. They are both location files, and the KMZ format is zipped, whereas the KML is not.
First, add a folder by right clicking and then “add” and then “folder.” Give the folder a name, and then click “Ok.” Next, right click your newly created folder and “Save Places As…” You now can navigate to save your file where you’d like and choose the .kmz or .kml format.


Adding Placemarks in Pro
You can search locations or coordinates in the search bar to navigate to places you’d like to add. Once there, click the yellow pushpin to add a placemark and make sure to give it a name. Note that you have options to “Add a web image…” by copy and pasting a Google Image or other web image link. You can also add image files you’ve saved by using the “Add local image link…”
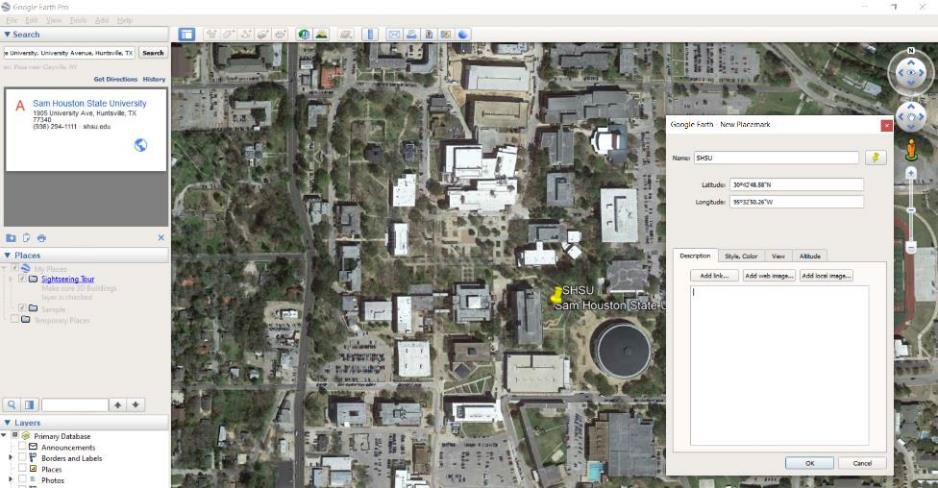
If your placemark appears under the folder you created, great. If not, you can drag it under the folder in the menu bar on the left. Make sure you do a “Save Places As…” by right clicking the folder each time you make a change to the folder/KMZ/KML.
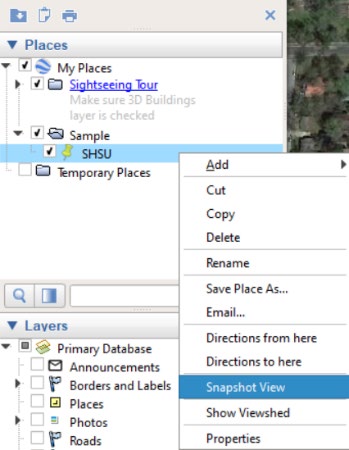
Note that for any placemark, line, or polygon location you can right click and find its coordinates under “Properties.” Under properties you can also change the symbol color and label color. You can also zoom in and zoom out to your placemark/path/polygon location in Google Earth until you get the exact view you want others to see, and if you right click it and select “snapshot view” you will preserve the zoom angle and altitude exactly as seen within Google Earth Pro at the time.

Adding a Polygon or Path/Line Feature in Pro

Figure 1. The toolbar in Google Earth Pro.
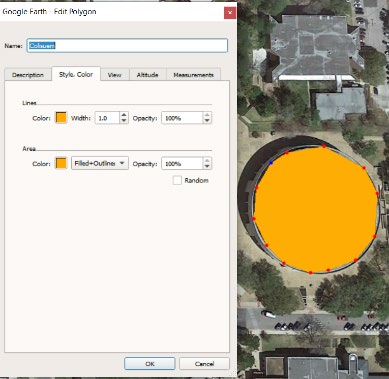
Using the polygon or path feature tool, draw the boundary or line around or along the area you wish. You can also change the line color or fill for a polygon. Don’t forget to “Save Places As…” once you’ve finished adding your new feature. Note that you can see the measurements of your feature under this “Properties” view where you can change the color by simply selecting the “Measurements” tab.
Using the Time Slider in Pro

Figure 1. The toolbar in Google Earth Pro.
Once you click on the time slider, you can drag the slider back to different years for which Google has obtained imagery. In some places, like the SHSU example below, the imagery only goes back to 1985 as of now. The image you see below is from the 1995 dataset. For some areas, like Harris County, or some other large urban areas around the U.S., imagery goes back to the 1930’s or 40’s, providing an opportunity to view major changes in development (or lack thereof) across the landscape.

Using the Ruler Tool in Pro

Figure 1. The toolbar in Google Earth Pro.
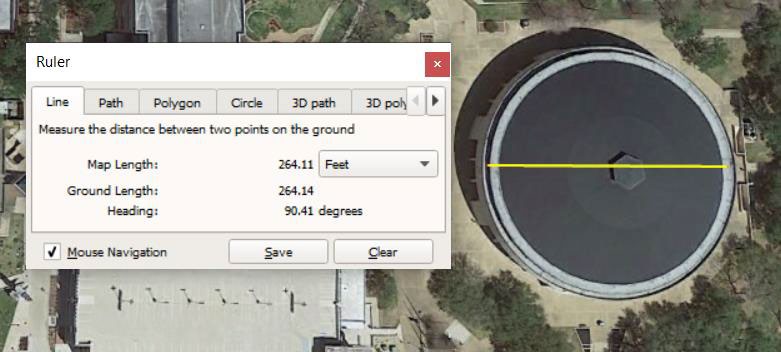
Once you open the “Ruler” tool, you have multiple options for measurements, including a single line, a multipoint path, polygon, etc. You also have the ability to choose the units of length and area you wish to use. This Ruler tool works just like the measuring tool in the web browser version. An example of a line and the resulting measurement follows:
Under the path tool with the ruler, you can also “Show Elevation Profile,” which is really useful for having students look at and better understand landforms and how the surface of the Earth works. For example, they can look at features in Texas like Enchanted Rock or other features around the world like Mt. Everest to get an idea of their size, slope, and elevation. An example below follows for looking at why rivers in Texas flow toward the Gulf of Mexico:

Layers in Pro
Within Google Earth Pro you can turn on or turn off any of the layers. To look at the landscape, it is sometimes valuable to turn off borders and labels to see the imagery more clearly in its raw form. However, when identifying geographic locations and relating concepts to regions, countries, or cities, it is clearly helpful to have on/selected.

View Options in Pro
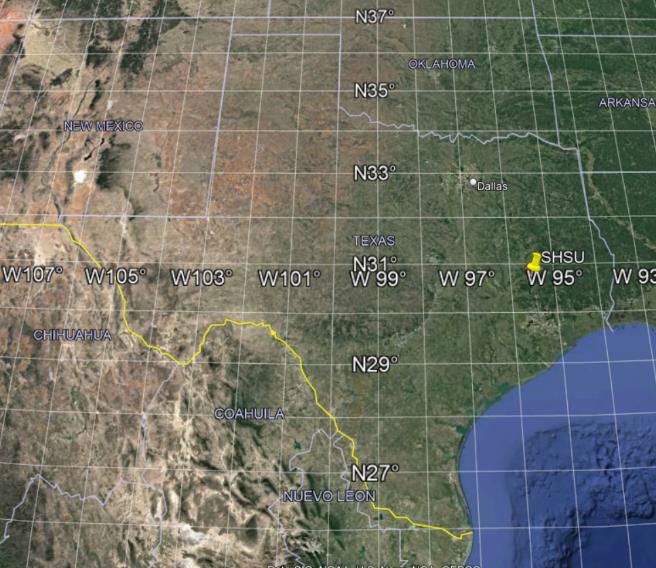
There are multiple view options, but one of the best ones available for students is being able to turn on the grid to work on latitude/longitude concepts. This is achieved by selecting the “Grid” option under “View” at the very top of the viewing window for Google Earth Pro.
Video Tour in Pro

Figure 1. The toolbar in Google Earth Pro.
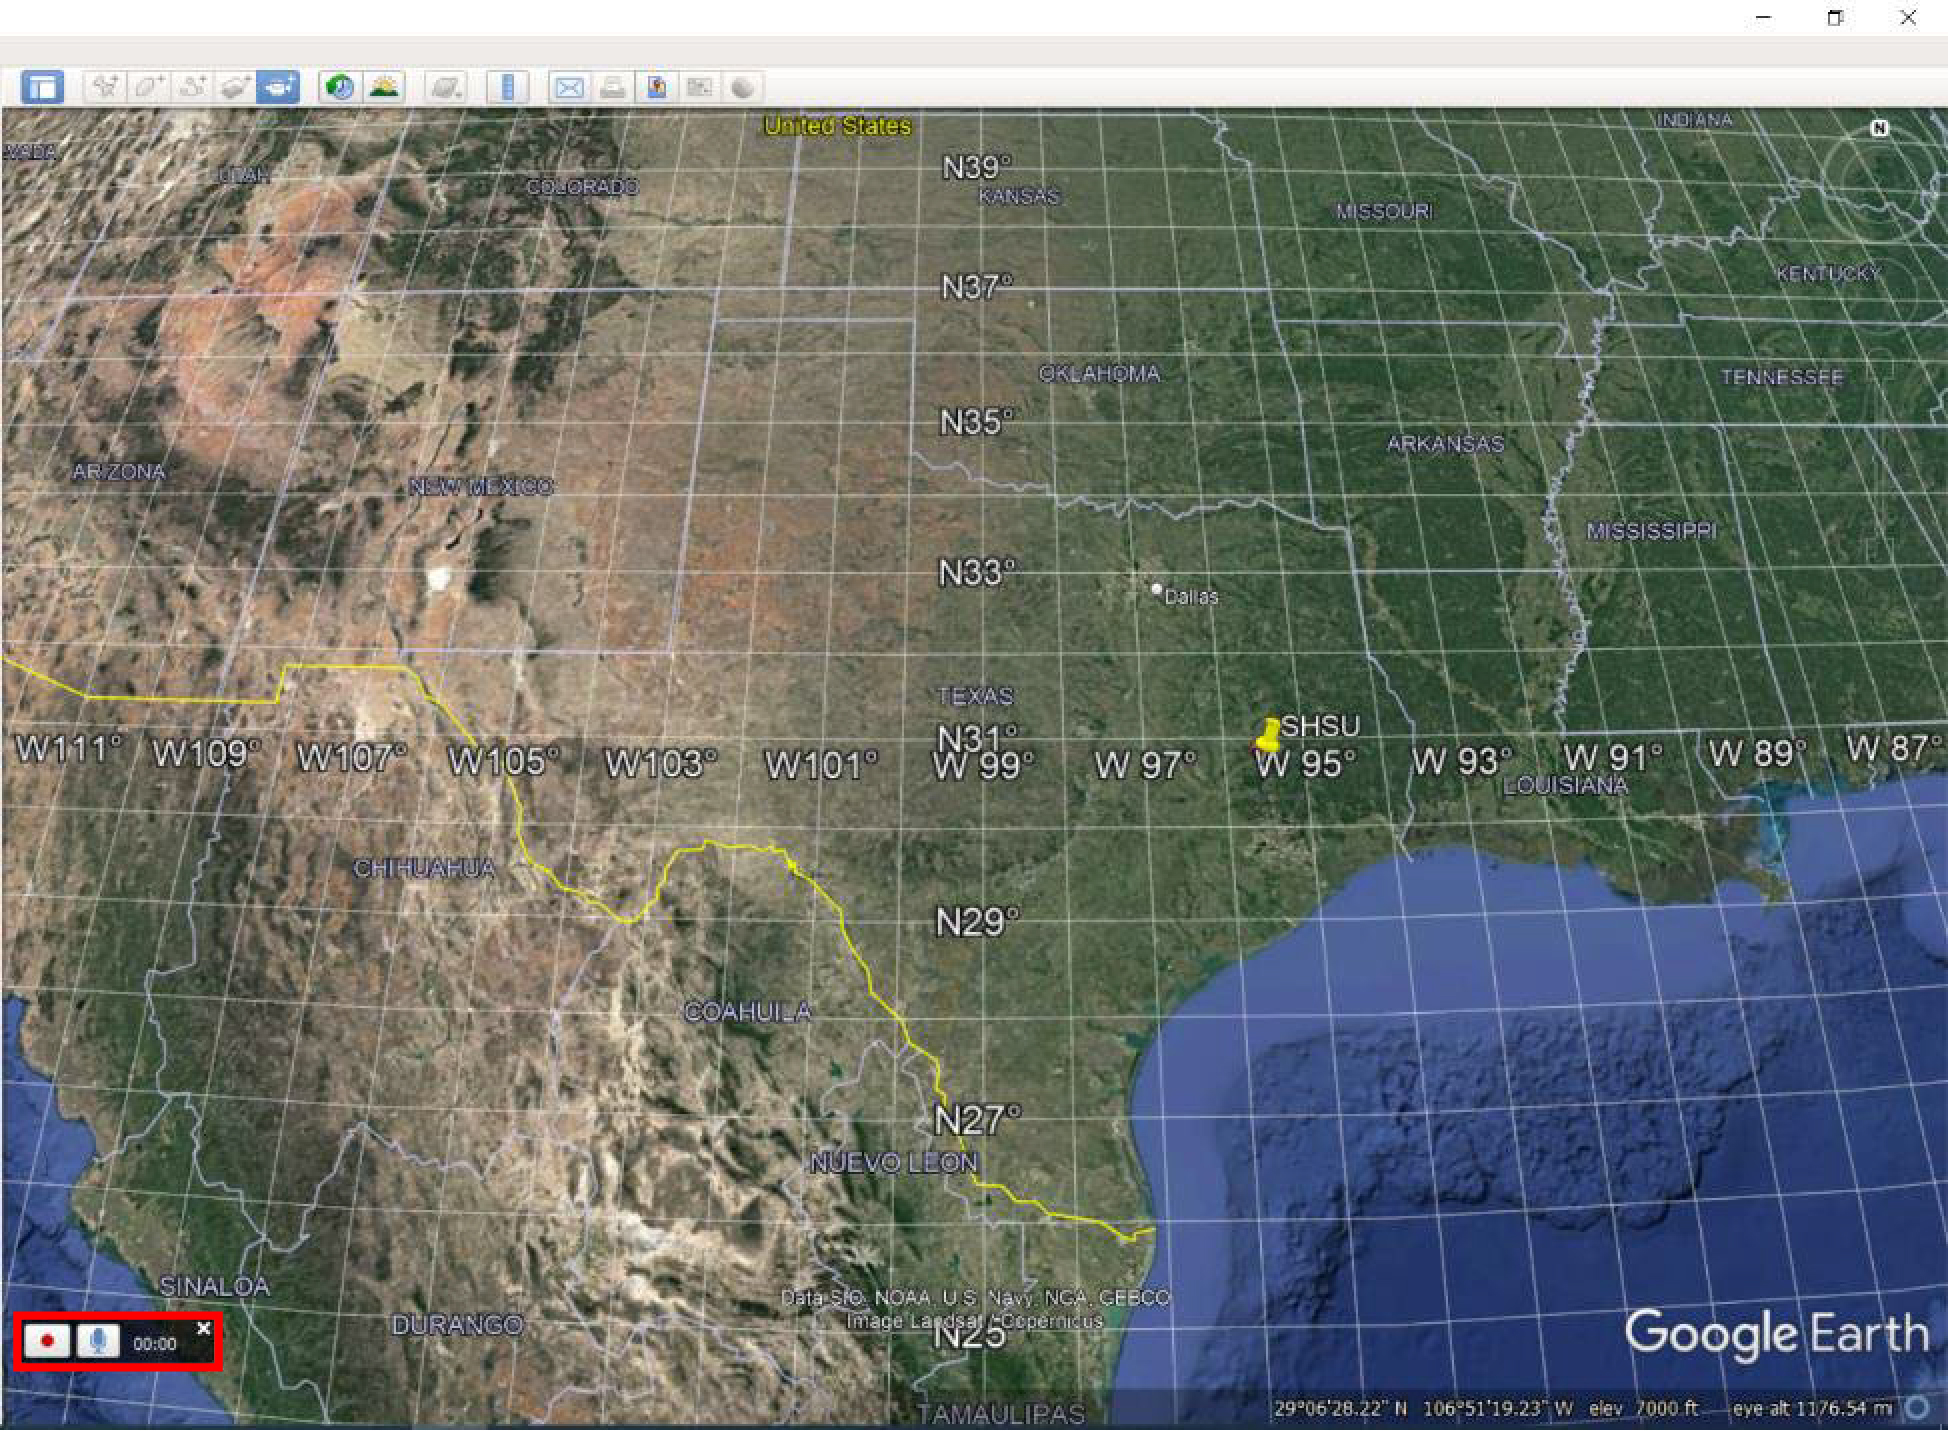
Finally, if you wish to record a video tour with audio to be used in Google Earth, you can select the camera icon in the toolbar while recording your voice narration. Be aware that the video captures every move you make around Google Earth window, so make sure you have a good idea of where you’re navigating to and in what order when you start recording.
Using Similar Tools in Google Earth for Web Browser


Create a Project and KML File in Earth for Browser
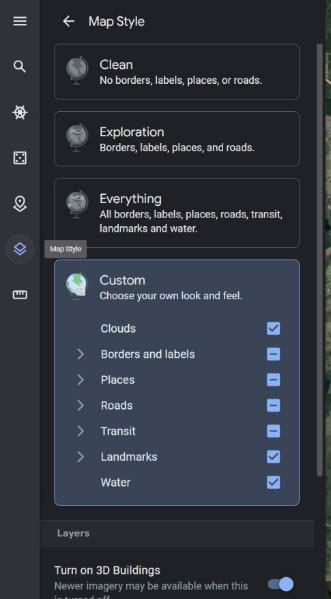
Click the “Projects” icon. You can either create a new file/project and give it a name and save as a KML (the browser version default) or navigate to open an existing KML or KMZ file. You can also set the map labels you want with the pre-set options or create your own custom view by selecting layers you’d like to hide or view under the “Map Style” icon in the toolbar on the left.

Add a Browser Version Placemark, Line, or Shape
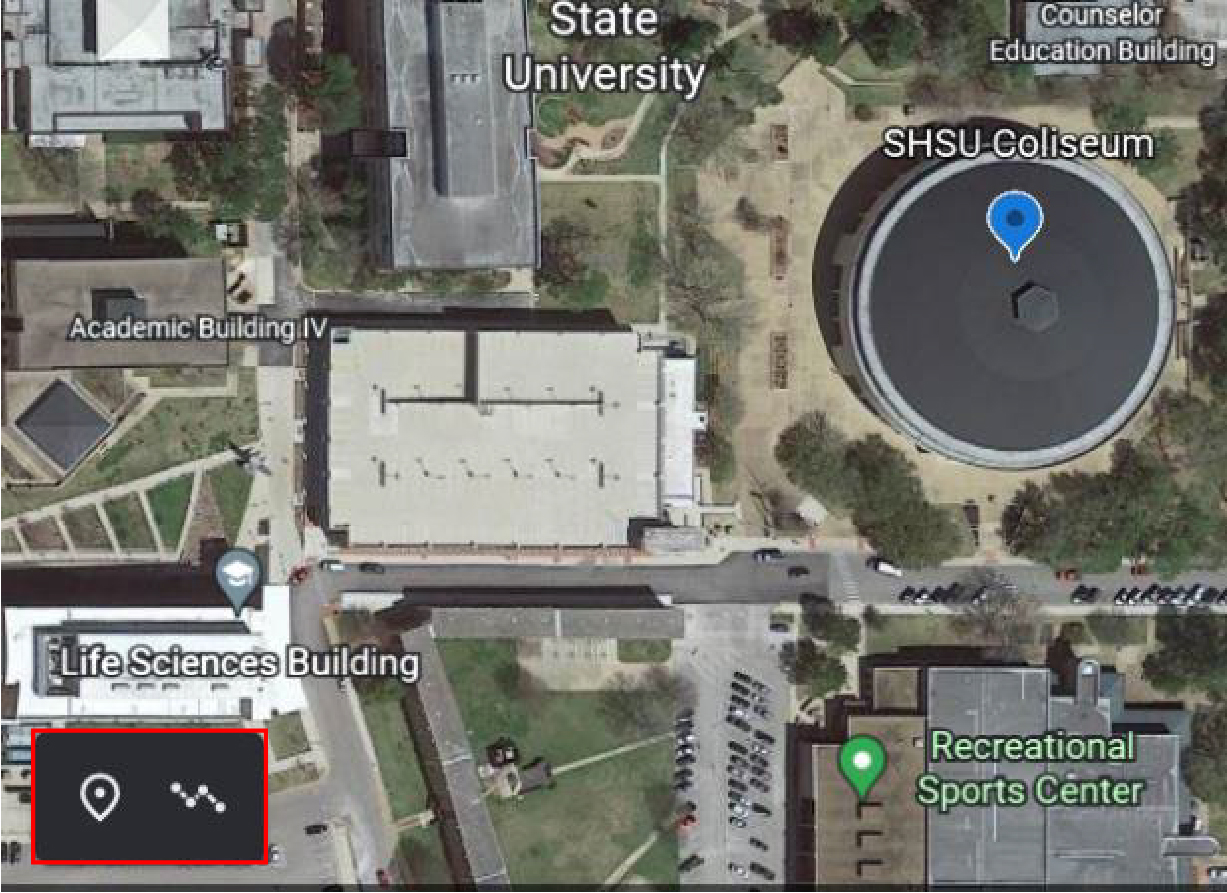
Click to add either a point feature with the placemark or a polygon or line (both under the line path icon).
Once your placemark is added you can name it, change the symbol, color, etc. You can also add images by clicking on the camera icon in the rectangular box at the top. If you have larger images, consider changing the “Info box” size under this screen as well to a “large info box.”
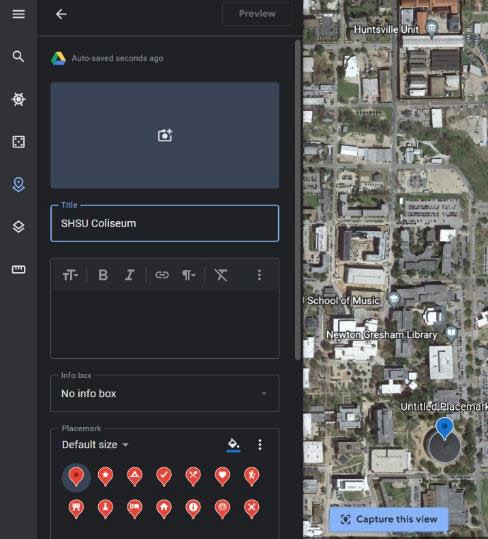
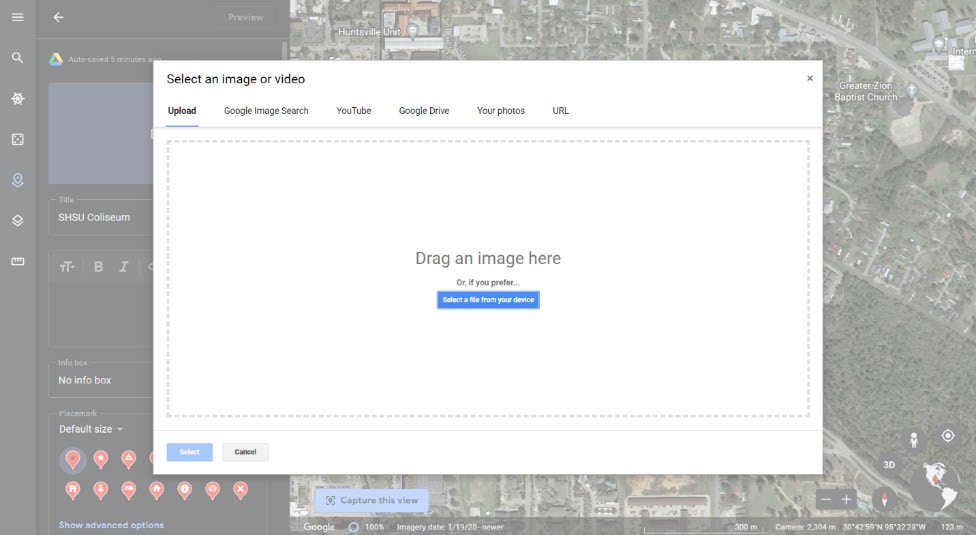
One of the great things about using the web browser version is you can simply add images or videos by just using the “Google Image Search” option you want associated with the placemark, line, or polygon feature. Remember you get to this screen by clicking on the camera icon with the plus in the last step.
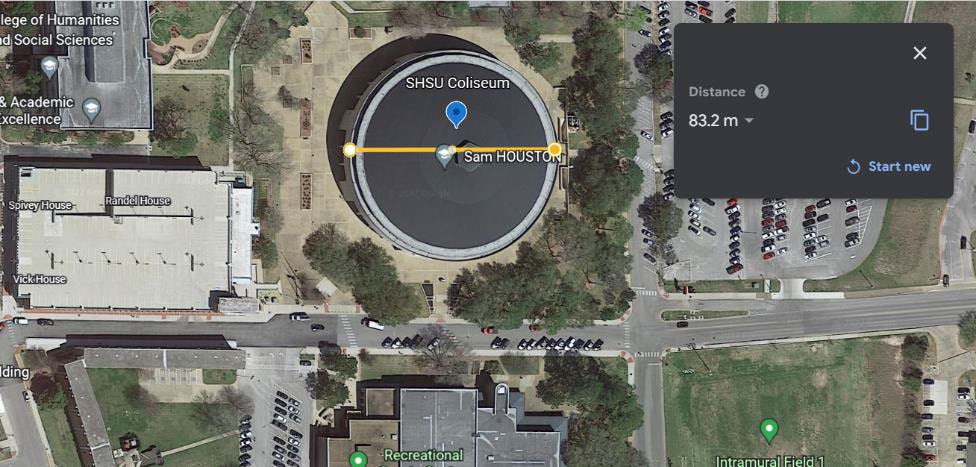
If you’d like to measure anything in Google Earth browser, remember you can use the ruler/measuring tool, but the elevation profile option isn’t available like it is in Pro.
Just like in Google Earth Pro, it’s good to save the file every so often to not lose all your work. To do this, make sure you export the project file as a KML:

Voyager
Using the Voyager option available in the menu bar, Google has many pre-built activities/modules to explore within the browser version. There are quiz games, time lapse options in layers, and many other things you and students can explore across the globe.
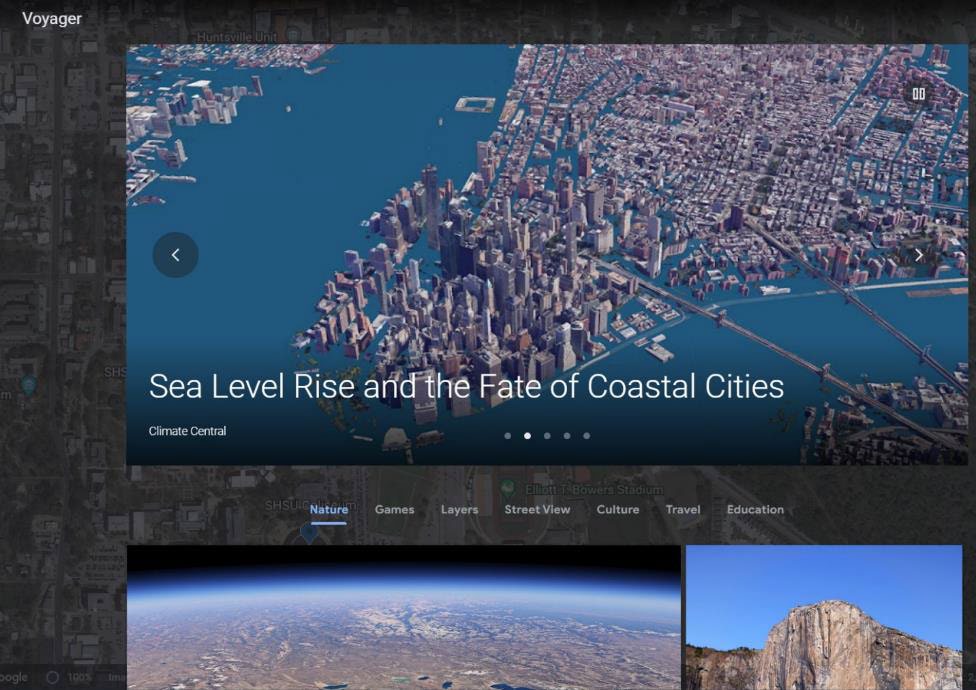
Using the dice icon, “I’m Feeling Lucky,” in the menu bar you can take a chance on being taken to all kinds of different random sites around the globe to learn about many different sites around the world.
Google Earth Resources
Additional Google Earth User Guide
Nat Geo's Google Earth in the Classroom (short video)
Nat Geo's Map Projection Exercise Using different maps in their books or that you find online, have students compare the size of North America, Greenland, and Africa on the maps. Next, have them open Google Earth. How do the same three areas compare in Google Earth vs. the 2D maps they’ve looked at? Discuss 2D vs 3D and distortions. When discussing world geography, history, and politics, how might the use of maps and perceptions of size of different areas influenced the world and its development?
Teaching with Google Earth Activities
Non-Google Earth Digital Map Viewing Resources
Some of these resources offer different options and imagery for weather, etc.
